

Show KNET, card and Apple Pay directly on your own checkout page, so your customer never leaves your site.
With Embedded Payment, the payment options appear inside your own checkout page. Your customer stays on your site to pay with KNET, card or Apple Pay, and SADAD Pay creates and processes the invoice in the background.
Embedded Payment needs a little more work than the Hosted Payment Page. Choose it when you want full control over the look of your checkout.
Before you start
- Embedded Payment must be enabled on your SADAD Pay account. If it is not, contact [email protected].
- You need an Access Token. See API Keys & Authentication.
- Serve your checkout page over HTTPS.
- All examples use the Sandbox URL. See Sandbox & Live Accounts for the Live URL.
What your customer sees
Each payment method is a small widget that you place on your page. You choose which ones to show.
| KNET | Credit / debit card |
|---|---|
| A KNET button. When the customer clicks it, they go to the KNET page to enter their card and PIN, then come back to your site. | A card form (name, card number, expiry, security code) shown inside your page. The customer pays without leaving. |
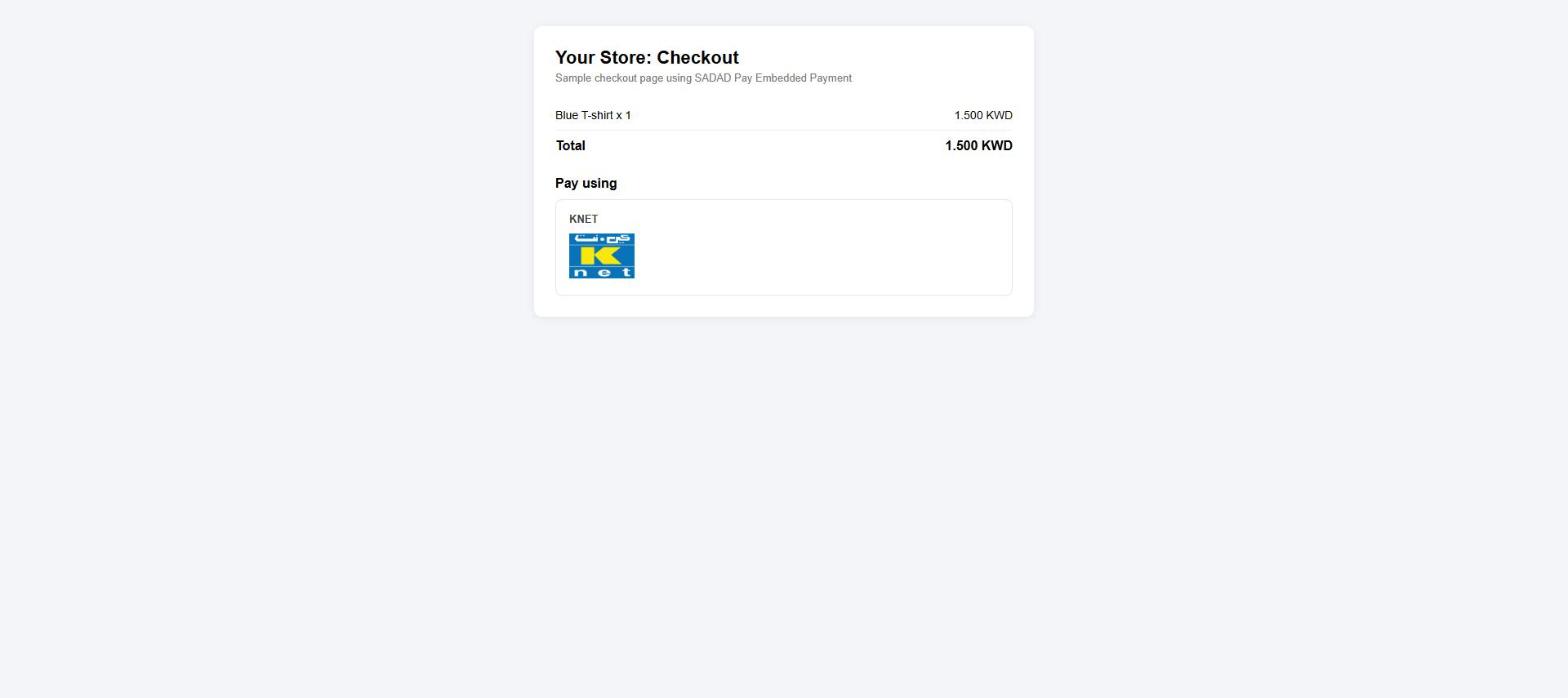
The KNET button on a sample checkout page
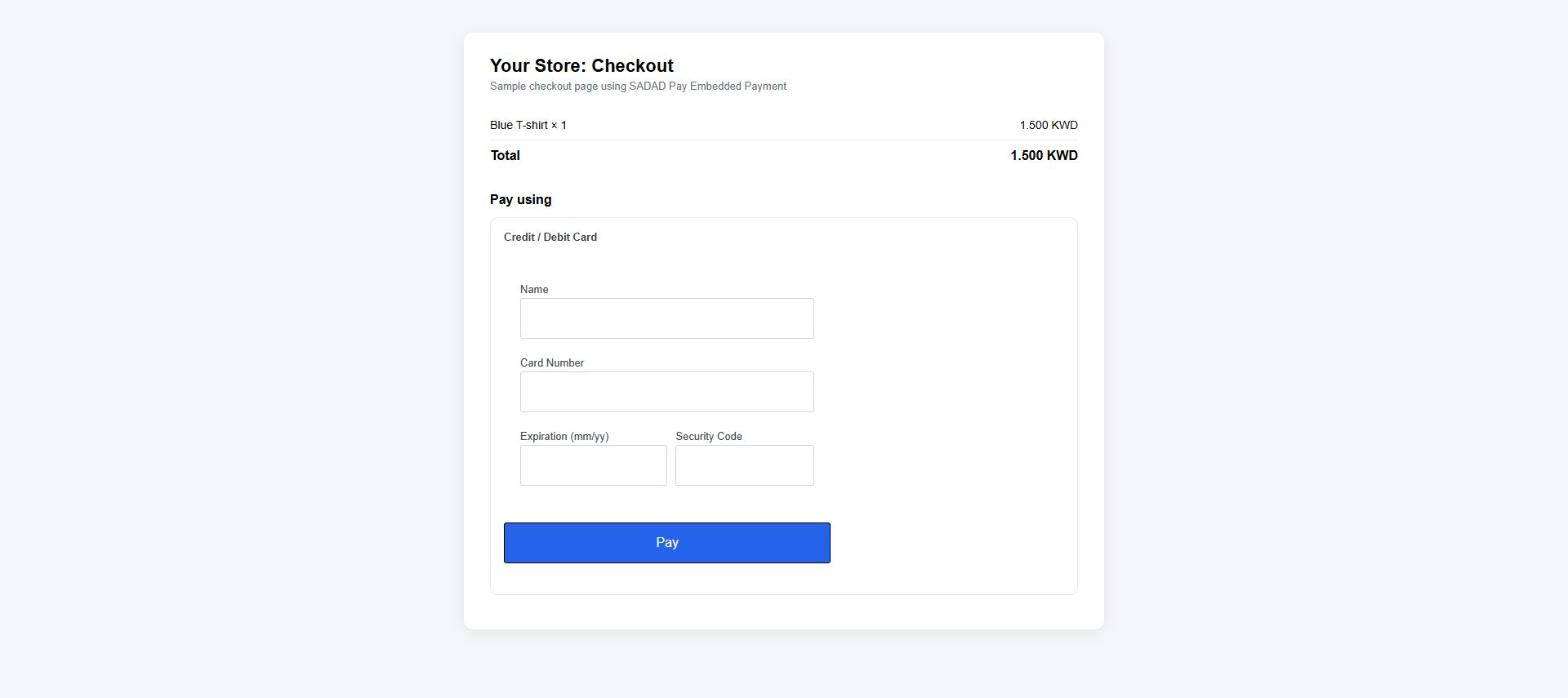
The card form on a sample checkout page
Step 1: Register your domain
Before the widgets can load, register every domain that will show them. You only do this once per domain.
Send the domain to POST /api/EmbeddedPayment/allow_domain · API Reference
| Field | Type | Required | Description | Example |
|---|---|---|---|---|
domain | string | Yes | Your website domain, without https:// or a path. Register www.yourstore.com and yourstore.com separately if you use both. | "yourstore.com" |
curl -X POST "https://apisandbox.sadadpay.net/api/EmbeddedPayment/allow_domain" \
  -H "Authorization: Bearer YOUR_ACCESS_TOKEN" \
  -H "Content-Type: application/json" \
  -d '{ "domain": "yourstore.com" }'
{
  "isValid": true,
  "errorKey": null,
  "response": {
    "result": true
  }
}
{
  "isValid": false,
  "errorKey": "DomainAlreadyExist",
  "response": null
}
Register in both environments
Sandbox and Live are separate. Register your domain in Sandbox for testing, and again in Live before you go live.
Step 2: Create a checkout session
For every order, create a checkout session before you show the widget. The session holds the order details, and SADAD Pay uses it to create the invoice when the customer pays.
Send the order to POST /api/EmbeddedPayment/intiate_order_session · API Reference
One session per payment method
A session is created for one payment method. If you show both KNET and card on the same page, create two sessions: one with
Knetand one withCCCSSA.
Request fields
| Field | Type | Required | Description | Example |
|---|---|---|---|---|
paymentGatewayCode | string | Yes | The payment method for this session. See the table below. | "Knet" |
ref_Number | string | Yes | Your own order or reference number. Use it to match the invoice to your order. | "ORD-1001" |
amount | number | Yes | The order amount in the currency set in currency_Code. Must be greater than 0. If you send items, it must equal the total of the items. | 1.500 |
currency_Code | string | Yes | KWD, USD, SAR, AED or QAR. | "KWD" |
customer_Name | string | Yes | The customer's name. | "Ahmed Ali" |
customer_Mobile | string | Recommended | The customer's mobile number. | "99999999" |
customer_Email | string | Recommended | The customer's email address. | "[email protected]" |
lang | string | No | en or ar. | "en" |
items | array | No | Line items, each with name, quantity and amount (price of one unit). | See example |
Payment method codes
paymentGatewayCode | Payment method | Widget |
|---|---|---|
Knet | KNET | KNET button |
CCCSSA | Visa and Mastercard | Card form |
ApplePay | Apple Pay | Apple Pay button |
Card gateway code
CCCSSAis the standard card code. If the session returnsPaymentMethodRequiredor the card widget does not work, contact [email protected] to confirm the card code for your account.
Examples
curl -X POST "https://apisandbox.sadadpay.net/api/EmbeddedPayment/intiate_order_session" \
  -H "Authorization: Bearer YOUR_ACCESS_TOKEN" \
  -H "Content-Type: application/json" \
  -d '{
    "paymentGatewayCode": "Knet",
    "ref_Number": "ORD-1001",
    "amount": 1.500,
    "currency_Code": "KWD",
    "customer_Name": "Ahmed Ali",
    "customer_Mobile": "99999999",
    "customer_Email": "[email protected]",
    "lang": "en"
  }'
curl -X POST "https://apisandbox.sadadpay.net/api/EmbeddedPayment/intiate_order_session" \
  -H "Authorization: Bearer YOUR_ACCESS_TOKEN" \
  -H "Content-Type: application/json" \
  -d '{
    "paymentGatewayCode": "CCCSSA",
    "ref_Number": "ORD-1002",
    "amount": 5.000,
    "currency_Code": "KWD",
    "customer_Name": "Ahmed Ali",
    "customer_Email": "[email protected]",
    "items": [
      { "name": "Blue T-shirt", "quantity": 2, "amount": 1.500 },
      { "name": "Cap", "quantity": 1, "amount": 2.000 }
    ]
  }'
Response
{
  "isValid": true,
  "errorKey": null,
  "response": {
    "session_Id": "11782RHMLZ1hZoc4qUjr60XNl5cAi3nqVky0KqPM8xudAnugbLnxyML"
  }
}
{
  "isValid": false,
  "errorKey": "ReferenceNumberRequired",
  "response": null
}
Pass the session_Id to your checkout page. Create a new session for every payment attempt.
Keep your Access Token on your server
Create the session from your server, never from JavaScript in the browser. Only the
session_Idshould reach the customer's browser.
Step 3: Show the payment widget
Add the widget to your checkout page. Each payment method has:
- A placeholder
divwhere the widget appears. - The SADAD Pay script for that method.
- A short configuration script that passes the
session_Id.
Use global variables
Declare
session_idandoptionswithvarat the top level of the script, exactly as in the examples. The widget reads them as global variables, so it will not load if you declare them withletorconstor inside a function.
Sandbox or Live
The last parameter of
Sadad.Configureselects the environment:truefor Sandbox,falsefor Live. The script URLs are the same for both.
<p>Pay using:</p>
<div id="sadad-knet-element"></div>

<script src="https://sadadpay.net/embedded/knet/knet-process.min.js"></script>
<script>
  var session_id = "SESSION_ID_FROM_STEP_2";
  var options = {
    "buttonVisible": true,   // show the KNET button
    "buttonWidth": "80px",   // KNET button width
    "successURL": "https://yourstore.com/payment/success",
    "failedURL": "https://yourstore.com/payment/failed"
  };

  Sadad.Configure(session_id, options, true); // true = Sandbox, false = Live

  // Optional: send the customer to KNET straight away, without showing the button
  // Sadad.ProcessSession();

  // Called if the payment cannot be started
  var SadadOnError = function (error) {
    console.log(error);
  };
</script>
<p>Pay using:</p>
<div id="sadad-card-element"></div>

<script src="https://sadadpay.net/embedded/card/card-process.min.js"></script>
<script>
  var session_id = "SESSION_ID_FROM_STEP_2";
  var options = {
    "lang": "en",                        // en or ar
    "backgroundColor": "#ffffff",
    "fontFamily": "'Poppins', sans-serif",
    "fontSize": "13px",
    "fontColor": "#707070",
    "buttonBackgroudColor": "#2563eb",   // spelled "Backgroud" in the SDK
    "buttonFontColor": "#ffffff",
    "textBoxFontColor": "#333333",
    "textBoxBackgroundColor": "#ffffff",
    "textBoxBorderColor": "#cccccc"
  };

  Sadad.Configure(session_id, options, true); // true = Sandbox, false = Live

  // Called when the payment succeeds
  var SadadOnSuccess = function (result) {
    // Send result.invoice_id to your server and verify it (Step 5)
    console.log(result);
  };

  // Called when the payment fails
  var SadadOnError = function (error) {
    console.log(error);
  };
</script>
<div id="sadad-applepay-element" class="apple-pay-button apple-pay-button-text-buy" lang="en"></div>

<!-- Shown when Apple Pay is not available on the device or browser -->
<p style="display:none" id="sadad-applepay-error">Apple Pay is not available on this device.</p>

<script src="https://sadadpay.net/embedded/applepay/applepay-process.js"></script>
<script>
  var session_id = "SESSION_ID_FROM_STEP_2";
  var vendor_id = "YOUR_VENDOR_ID";
  var options = {
    "CompanyName": "Your Store",  // name shown on the Apple Pay sheet
    "Amount": 1.500,              // same amount as the session
    "buttonWidth": "80px"
  };

  Sadad.Configure(vendor_id, session_id, options, true); // true = Sandbox, false = Live

  var SadadSuccess = function () {
    console.log("payment completed");
  };

  var SadadOnError = function (error) {
    console.log(error);
  };
</script>
Card form style options
All style options are optional. Leave out any you do not need.
| Option | What it changes |
|---|---|
lang | Form language: en or ar |
backgroundColor | Form background |
fontFamily, fontSize, fontColor | Label text |
buttonBackgroudColor, buttonFontColor | Pay button |
textBoxFontColor, textBoxBackgroundColor, textBoxBorderColor | Input boxes |
Apple Pay requirements
Apple Pay needs extra setup
- Your domain must be registered and verified with Apple before you start. This is done through an Apple Developer account: create an Apple Pay Merchant ID, upload Apple's domain verification file to your website, then verify the domain in your Apple Developer account.
- The Apple Pay button only appears on devices and browsers that support Apple Pay, such as Safari on an iPhone, iPad or Mac with Apple Pay set up. Elsewhere, the
sadad-applepay-errormessage is shown instead.vendor_idis your SADAD Pay vendor ID. Contact [email protected] if you do not know it.
Step 4: Get the payment result
How you receive the result depends on the payment method.
KNET: redirect to your URL
After the customer pays on the KNET page, SADAD Pay sends them back to the successURL or failedURL you set in options. The invoice ID is added as the invoice_id parameter.
https://yourstore.com/payment/success?invoice_id=71461
Read invoice_id on your server and continue to Step 5.
Card: JavaScript callback
The customer stays on your page. When the payment succeeds, the widget calls your SadadOnSuccess function. Read result.invoice_id, send it to your server, and continue to Step 5. If the payment fails, SadadOnError is called instead.
Apple Pay: JavaScript callback
When the payment completes, the widget calls your SadadSuccess function. If it fails, SadadOnError is called. This callback does not return an invoice ID, so use the webhook to learn which invoice was paid, then continue to Step 5.
The invoice is created when the customer pays
SADAD Pay creates the invoice from the session at payment time. It is a normal invoice: you can see it in the portal under Invoices, and it carries your
ref_Numberanditems.
The result on the page is not proof of payment
The redirect URL and the JavaScript callback both run in the customer's browser, so they can be changed. Always continue to Step 5 and verify the payment from your server.
Step 5: Verify the payment
From your server, call GET /api/Invoice/getbyid?id={invoice_id} and check the status field before you complete the order. This is the same check as in the Hosted Payment Page.
| Status | Meaning | What to do |
|---|---|---|
Paid | Paid successfully | Complete the order |
Unpaid | Not paid, or the payment failed | Do not complete the order |
Canceled | The invoice was cancelled | Do not complete the order |
Refunded | The payment was refunded | Cancel or reverse the order |
Also check that ref_Number and amount match your order.
Never skip verification
SADAD Pay is not responsible for orders completed without verifying that the invoice status is
Paid.
Use webhooks too
If the customer closes the browser before the result reaches your page, the webhook still tells your server that the invoice was paid. See Webhooks.
Test your integration
- Register your test domain in Sandbox (Step 1).
- Create a session with
"paymentGatewayCode": "Knet"(Step 2). - Load your page with
Sadad.Configure(session_id, options, true). - Pay with the KNET test card from Test Cards.
- Check that your server verifies the invoice as
Paid(Step 5).
Repeat with CCCSSA and a test card to check the card form.
Common errors
All errors are returned with HTTP 200 and "isValid": false. Always check isValid.
| errorKey | Endpoint | Cause | How to fix |
|---|---|---|---|
InvalidDomainName | allow_domain | The domain is not valid | Send only the domain, such as yourstore.com, without https:// or a path |
DomainAlreadyExist | allow_domain | The domain is already registered | Nothing to do. You can use it. |
ReferenceNumberRequired | intiate_order_session | ref_Number is missing | Send your order reference |
PaymentMethodRequired | intiate_order_session | paymentGatewayCode is missing | Send Knet, CCCSSA or ApplePay |
AmountRequired | intiate_order_session | amount is missing or 0 | Send an amount greater than 0 |
CustomerNameRequired | intiate_order_session | customer_Name is missing | Send the customer's name |
InvalidCurrencyCode | intiate_order_session | currency_Code is missing or not supported | Send KWD, USD, SAR, AED or QAR |
InvoiceAmountMustEqualsToTotalItemsAmount | intiate_order_session | amount does not equal the total of the items | Make amount equal the sum of quantity × amount |
UnauthorizedAccess (HTTP 401) | All | The Access Token is missing, wrong or expired | Generate a new Access Token |
Widget does not appear? Check that:
- The domain of the page is registered (Step 1) in the same environment.
session_idandoptionsare declared withvarat the top level.- The last parameter of
Sadad.Configurematches the environment (truefor Sandbox). - The session was created for the same payment method as the widget.
Next steps
- Receive payment notifications on your server with Webhooks.
- Test with the Test Cards.
- Before going live, follow the Go-Live Checklist.